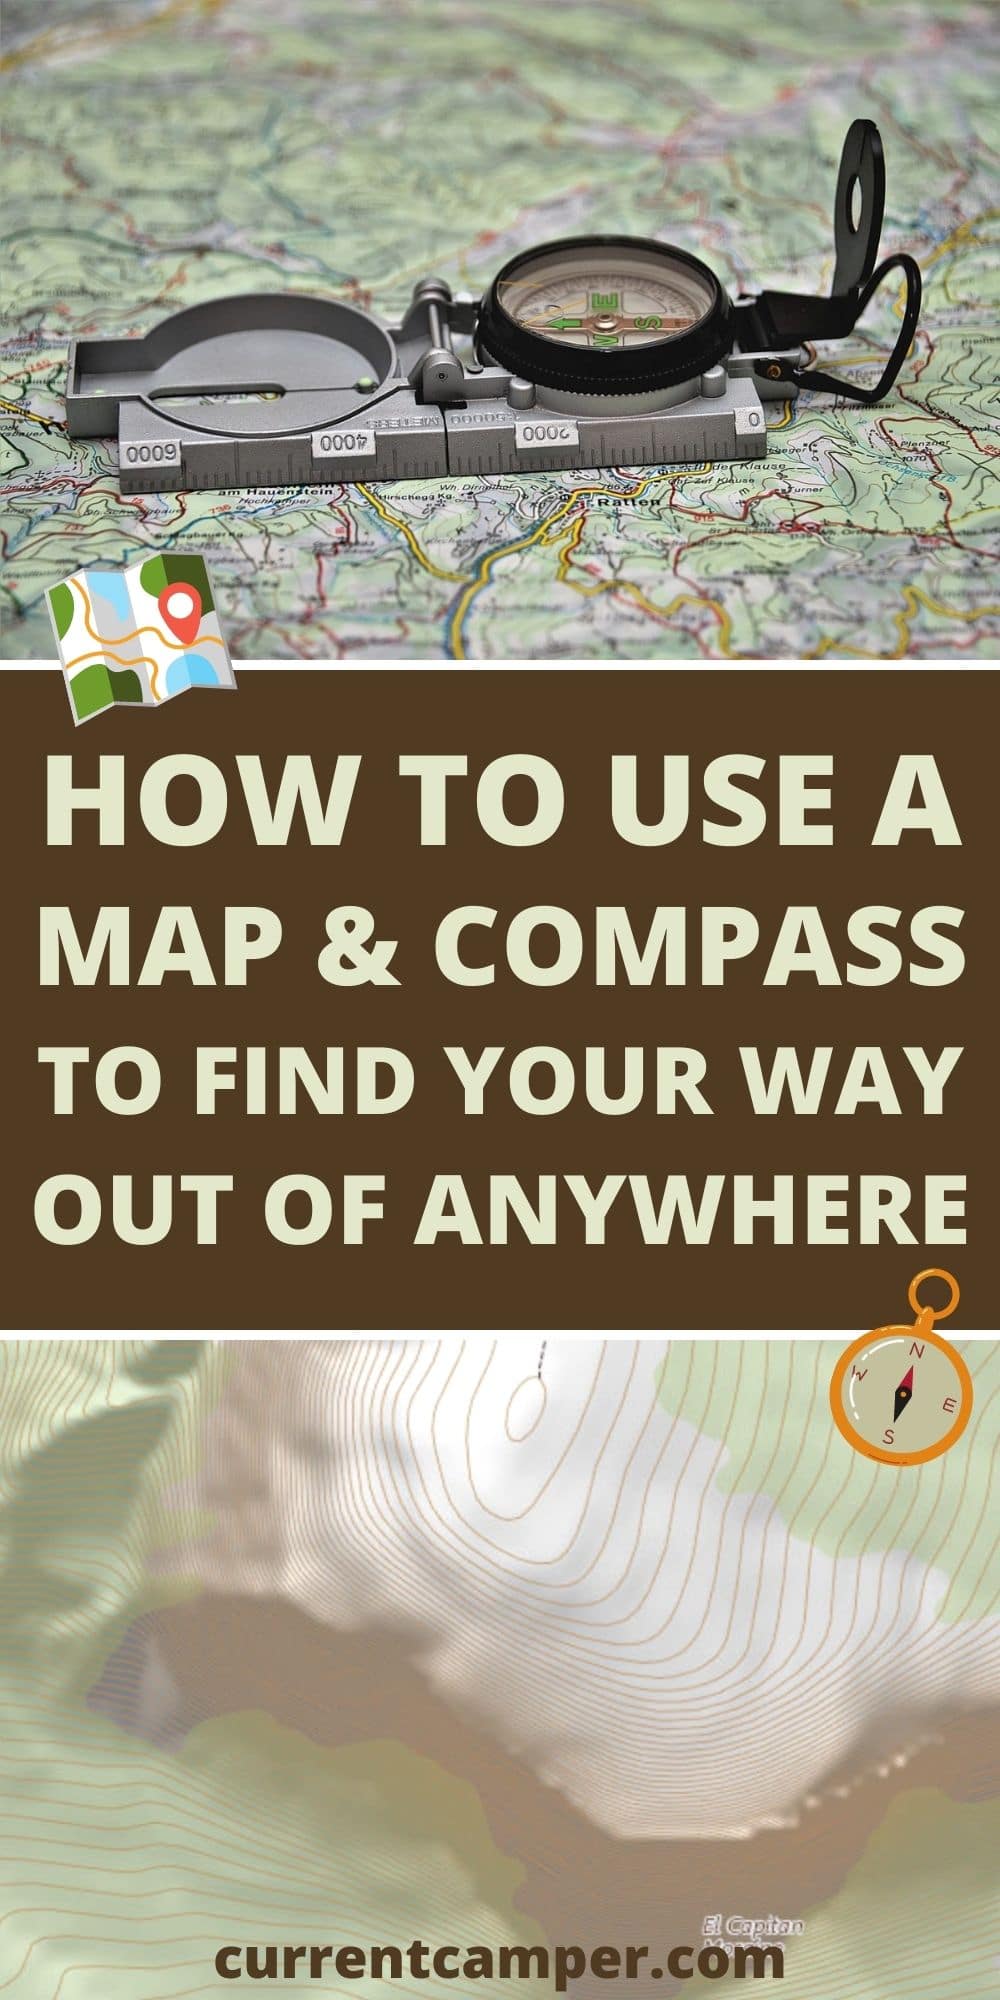
No matter how much technology evolves, a map and compass will always be the most reliable method of finding your way in the wilderness.
This article will explain what features make a compass and map useful, help you decide what kind of compass will best suit your needs, and show you how to put it all together to use this backpacking essential to find your way in the wilderness.
The map and compass are unrestrained by battery life or the availability of GPS data, making them a bedrock navigation necessity in every hiker or camper’s backpack.
As one of the “Four Great Inventions” of ancient China (alongside gunpowder, paper making, and printing), the compass has enabled humanity to wander into the unknown without fear of losing the way for thousands of years.
So it’s no surprise to see the map and compass listed among the indisputable Ten Essentials for backpacking that was originally published by the mountaineering community back in 1974.
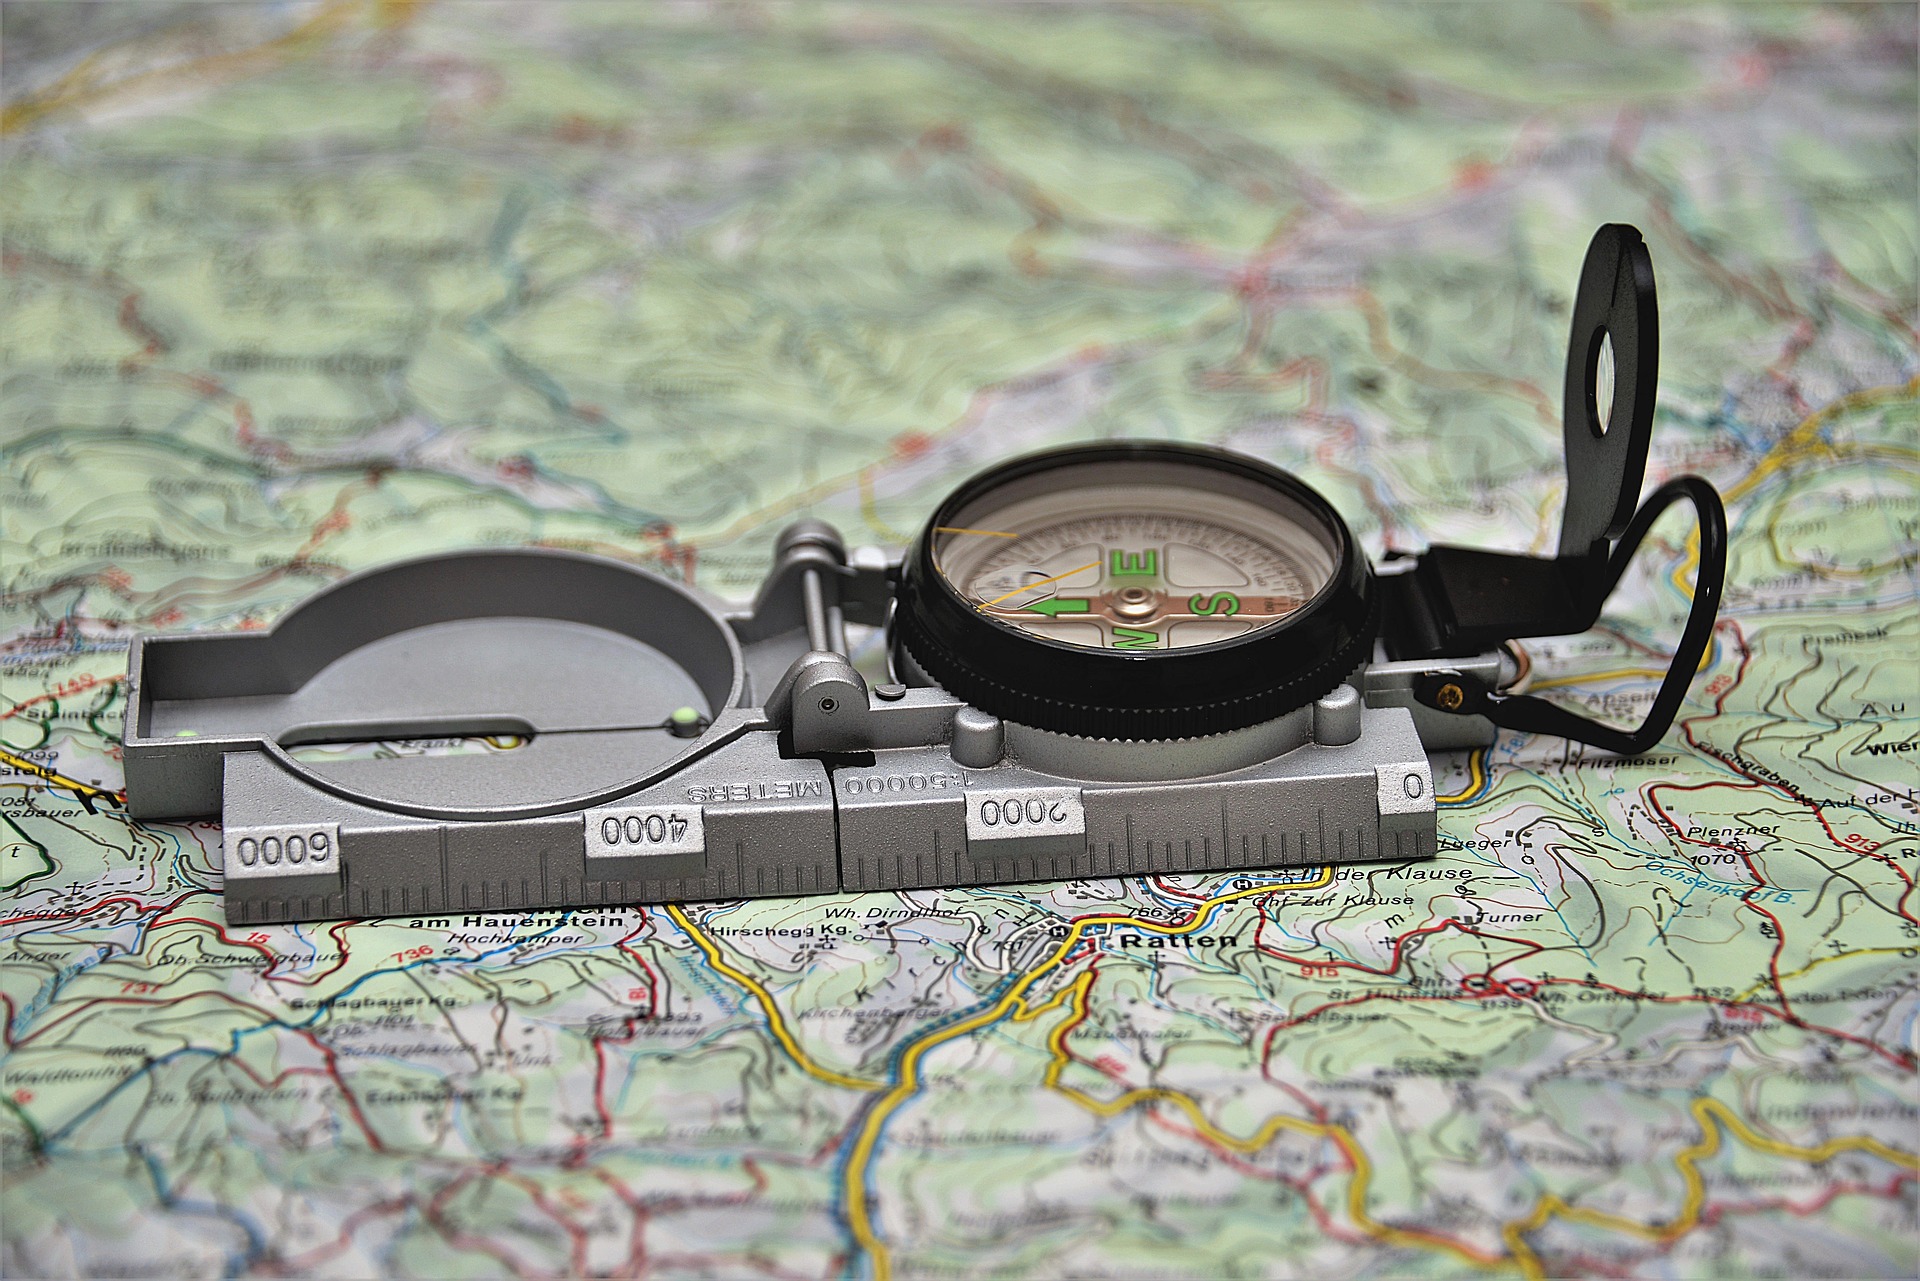
Before we get into the details of navigating with these tools, let’s take a detailed look at each of their parts:
Get To Know Your Compass
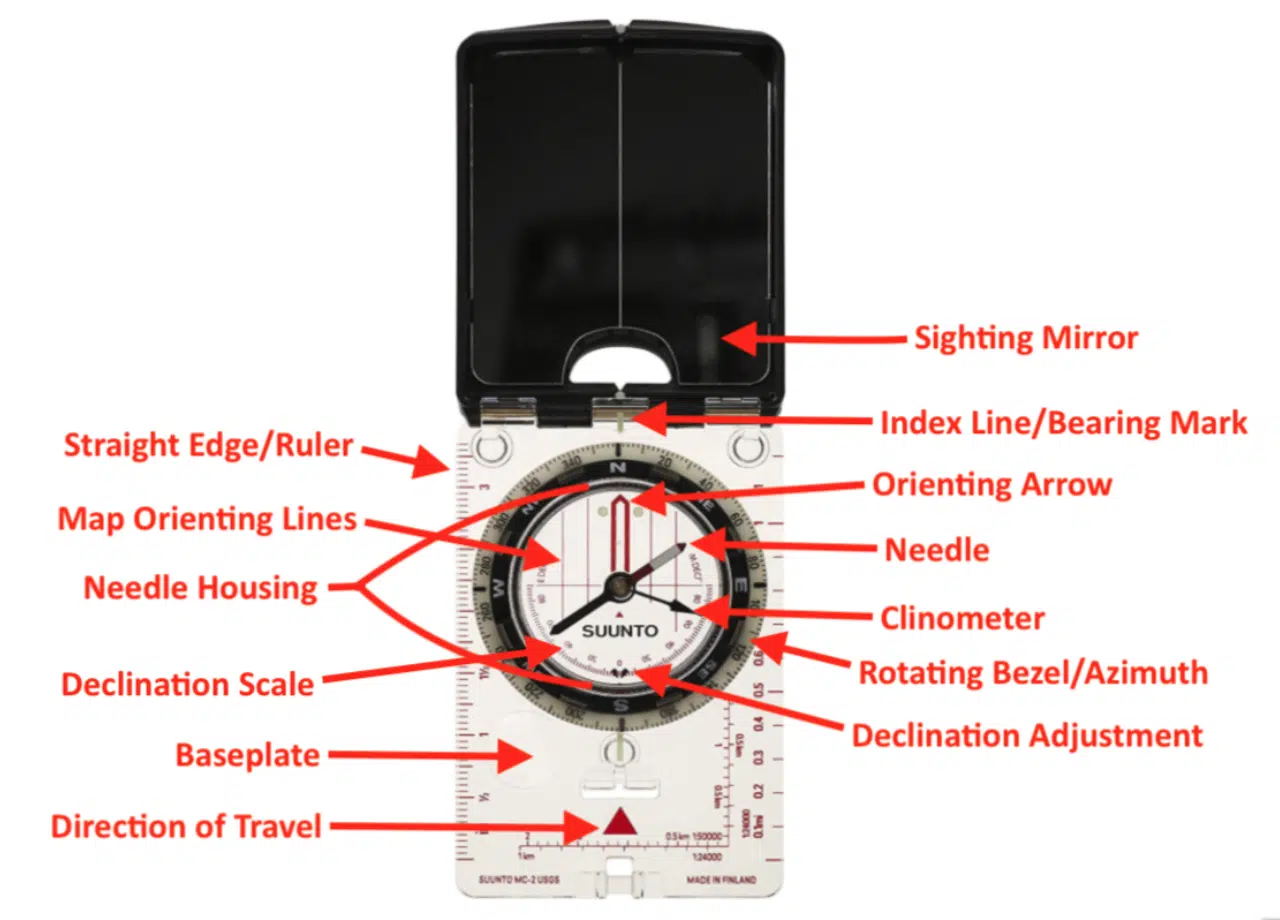
Of the features above, a GOOD compass will include the following:
Magnetic Indicator Needle
The heart of every compass, the magnetic needle, sits inside the needle housing and always points toward the “magnetic north” of the Earth’s magnetic pole.
Baseplate
A good navigating compass should include a flat, clear baseplate that allows it to lay it on top of a map while still being able to see the details underneath.
Declination Adjustment
Compasses with a declination adjustment can be adjusted and set to remain at the declination of the area you’re navigating, so once you’ve got it dialed in, you don’t have to take the time to recalculate true north each time you take out your compass.
If you’re not familiar with the term declination, it’s similar to the concept of latitude on a map, and is a measurement of the distance between “true north,” or the fixed location of Earth’s physical North Pole, and “magnetic north” which is the slowly changing direction of the Earth’s magnetic pole.
Depending on where you’re standing on the planet, the difference in declination between magnetic north and true north can vary wildly, ranging anywhere from 90 degrees to -90 degrees as measured on your compass.
The average price difference between a declination adjustable and non-adjustable compass is less than $20, so although this feature isn’t absolutely essential for navigation, there’s really no good reason to purchase a compass with a fixed declination scale.
We will come back to declination when we visit the maps section, as any good topographic map should include declination information for the area it covers to help take any guesswork out of navigation.
Straight Edge/Ruler
You’ll use the ruler on your compass in conjunction with the scale on your map to determine approximate real-world distances between points.
The straight edge on the side of your compass will be used to transfer bearings directly onto your map, as well as determining your location on a map from the field.
Direction of Travel Arrow
Just like the name suggests, the direction of travel arrow on a compass will keep you pointed in the right direction once you’ve set your bearing.
It is also used as a reference for the direction you’ll be traveling when plotting your course onto your map.
Rotating Bezel/Azimuth
All navigational compasses should include a rotating bezel (or azimuth ring) with markings ranging a full 360 degrees.
Degree markings on your bezel will be used in conjunction with the index marking on your compass to “take a bearing,” which is the term used to describe the relative direction in degrees from your current location to your destination.
Orienting Arrow
The orienting arrow of a compass is used to indicate where the magnetic needle must be aligned to ensure you’re moving in the right direction after taking your bearing.
Once you’ve adjusted for declination and taken your bearing on your map, you simply line your magnetic needle up with the orienting arrow and start walking!
Map Orienting Lines
These thin lines inside the needle housing are used to ensure your compass is aligned with the true north indicated on a map once you’ve adjusted for declination.
In addition to these, a GREAT compass can also include:
Clinometer
A clinometer (also referred to as inclinometer, declinometer, or slope gauge) can also be a very useful feature on a compass as it measures how steep (the vertical angle) a piece of terrain is.
Clinometers are essential when navigating snow-covered mountains because they serve as a reliable indicator of the potential for an avalanche.
Other useful features of a clinometer-equipped compass include the ability to measure the angle of the sun (without staring directly into it… ouch…) and measuring the height of just about anything you can see — from the tree in front of you to a mountain peak on the horizon.
Sighting Mirror
A sighting mirror is a mirrored backing attached to the top of a compass that allows you to more accurately sight-in a geographic landmark (such as a mountain peak) while easily taking a reading from your compass at the same time.
A sighting mirror isn’t absolutely essential, but many premium compasses will include one, and they make taking accurate measurements of your location much easier.
A sighting mirror will also double as an emergency tool you can use to signal for help from a distance.
Global Needle
Rather than having to choose between either a Northern or Southern Hemisphere compass, a global needle is a premium feature that allows for magnetic field differences in different parts of the world.
Having a compass with a global needle will ensure that it is accurate regardless of which hemisphere you’re coming from or traveling to.
READ MORE: Day Hike: What To Bring On Your Next Adventure
Get to Know Your Map
Contour Lines
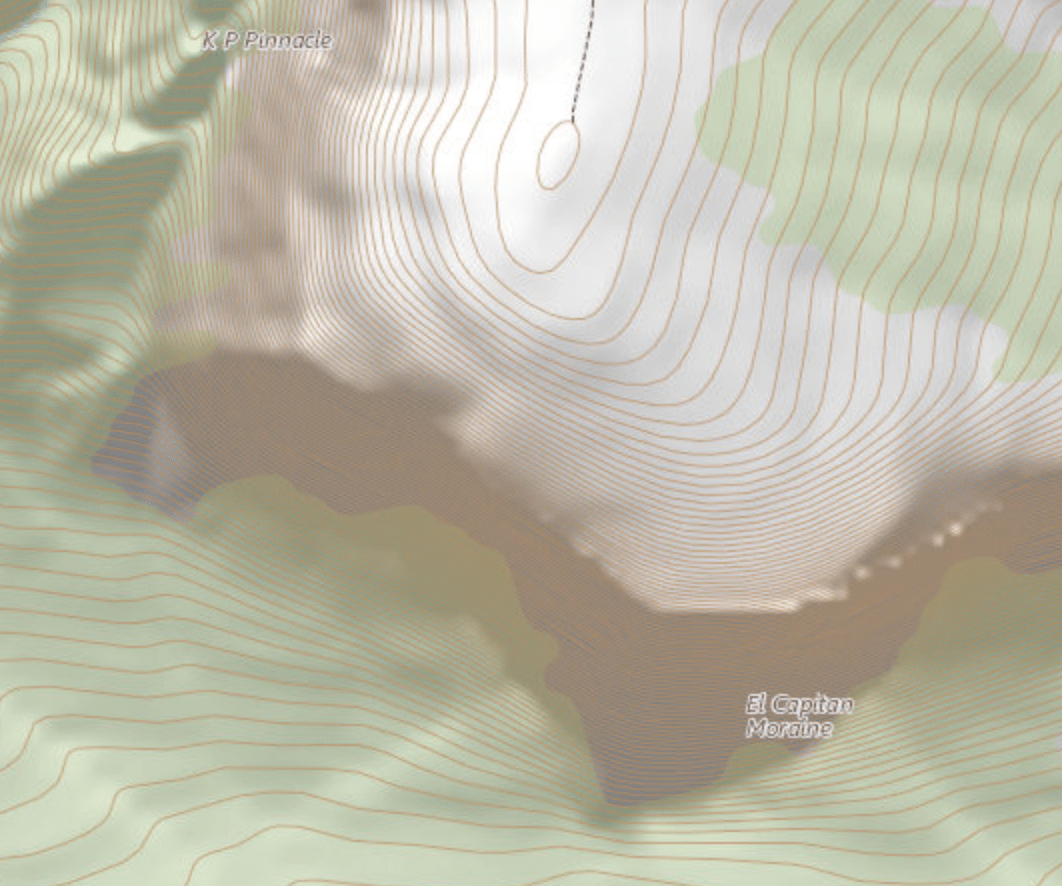
Contour lines are what set a topographic, or “topo” map apart from a regular 2D map.
Contour lines on a map that are close together indicate a steep slope and rapidly changing elevation, whereas lines that are far apart indicate areas that are relatively flat.
Take a look at the brown contour lines on this section of a topo map from the US Geological Survey. Look familiar?
El Capitan in Yosemite may not be a piece of terrain you’d want to attack on foot to say the least:
Contour lines are indispensable when plotting a course off the beaten trail, as the best path between your location and your destination may have geographic features that prevent you from walking straight ahead.
Using a combination of your compass, the map legend, and the map scale, you can determine just how much and how quickly elevation changes over a given distance, and easily identify impassable terrain such as steep cliffs and ravines.
Scale
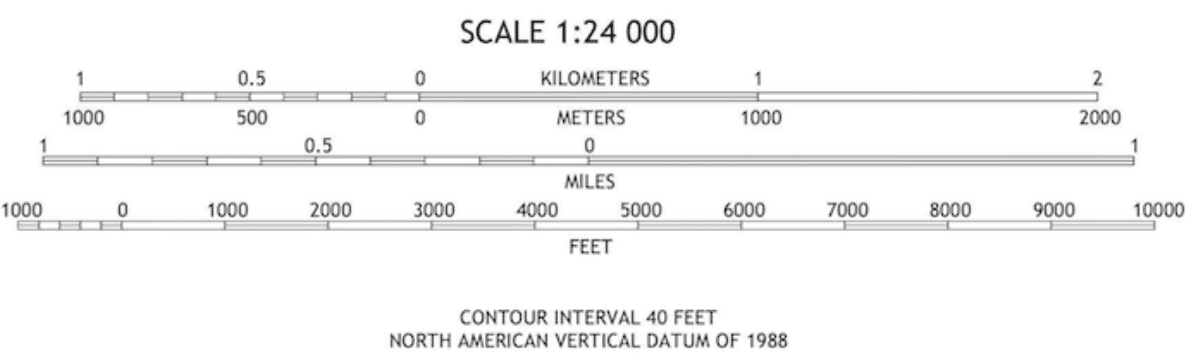
There are two types of scale you’ll want to take note of when reading your map, the distance scale and the contour interval.
Here’s the scale from another example from a US Geological Survey map, which can be found for free on their website.
The distance scale on your map will give you a relative measurement of the real world distance between two points.
Just place the ruler on your compass down alongside the scale, take a note of the distance, and bring it back to your planned route on the map to get an idea of how far you’ll be hiking between point A and point B.
The contour interval above, on the other hand, tells you how much distance is between each contour line on your map, which will help you determine exactly how steep each feature on the map will be.
Orientation Lines
Most topo maps will include orientation lines that you can align with the orientation lines on your compass to help ensure you’re getting the most accurate alignment with true north as possible.
If your topo map doesn’t include usable orientation lines, don’t sweat it.
You can always just use the right and left edges of a map, as they are always square, and the top of your map will always be true north.
Legend
Found at the bottom of your map, the legend is extremely useful as it breaks down the meaning of each line, color, and symbol displayed on a topo map.
This will be useful in identifying potential water sources, shelters, and established trails as you navigate the area.
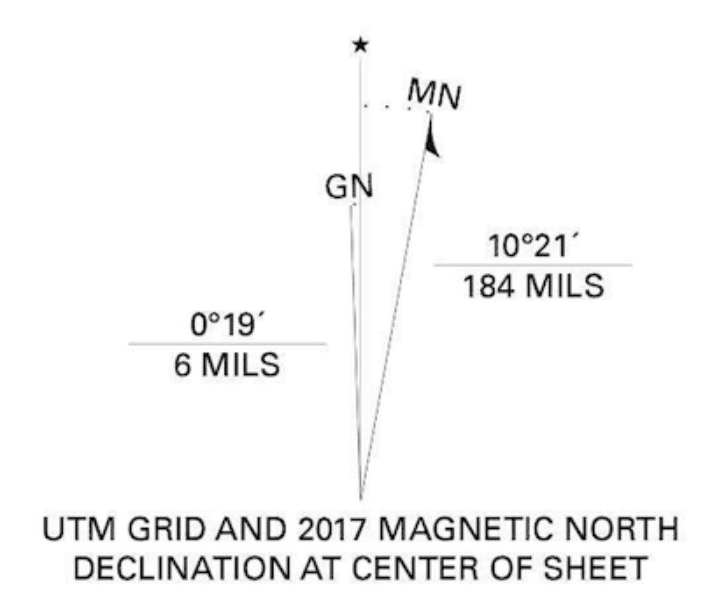
The declination information for the area is typically found alongside the legend, and will look something like this one for +10 degrees:
Remember to verify each topographic map you’ll be using in the field prior to setting out to ensure the revision date isn’t any more than a couple years old.
The National Oceanic and Atmospheric Administration keeps a handy declination calculator tool on their site, so if the date on your topographic map is over two years old, or you just want to ensure you have the most up-to-date measurement, you can use their site to verify declination in a given location.
Putting It All Together: Using Your Map and Compass to Navigate
Now that you’re familiar with the components of your map and your compass, here’s the step-by-step to finding your way around the woods:
Step 1: Set Declination
Using the declination data from your map, adjust your compass to align with “true north.”
This is done by starting out with the bezel and the orienting arrow set to “N” or the 0 degree mark indicated on the bezel (also called zeroing-out), then turning the declination adjustment clockwise or counterclockwise however many degrees are indicated on your map of the area.
As you do this, you’ll see the orientation arrow move from the “N” mark on the bezel to its new declination-adjusted home inside the needle housing.
Now, when you hold your compass out flat in front of you with the needle inside the orienting arrow, you’ll be facing true north.
Step 2: Find Your Current Location On The Map
Next, if you don’t already know where on the map you’re currently standing, it’s time to figure out your location.
To do this, you’ll want to identify a geographic landmark you can see, such as a mountain peak or body of water, and use your compass to triangulate your position.
Point the direction of travel arrow on your compass directly at the landmark, and then, holding the compass flat, rotate the bezel of the compass until the needle sits inside of the orienting arrow. (this is where a sighting mirror comes in handy).
Take a bearing reading from the index, and write it down.
Next, place the front corner of your compass (the front corner can be either corner along the front edge of your compass where the direction of travel arrow points) on the map at the point where the geographic landmark is shown.
Now, rotate the entire compass (not the bezel!) to align the orienting lines inside the needle housing with true north on the map. Once you’ve aligned the compass to the map, draw a line on the map from the landmark at the front corner down along the straight edge of your compass.
The line you’ve just drawn will point back to your approximate location.
Now, if you want to find your exact location, pick two additional geographic landmarks, each one at least 60 degrees from your first landmark, and repeat this process.
Once you’ve got your three lines drawn, you should be left with a small triangle at their intersection. Congrats, you’re standing inside of that triangle on the map!
Step 3: Find Your Bearing
Now that you know where you are on the map, it’s time to plot the path to your destination.
Start to find your bearing by setting the straight edge of your compass alongside your location on the map.
Next, choose the point you want to hike to on the map, and rotate the entire compass until the straight edge of the baseplate forms a straight line between you and your destination.
Now, rotate the bezel of your compass so that the N or “0” indicator on the bezel is aligned with “true north” on the map. Again, the orienting lines inside of your needle housing can be used to help you get the most accurate reading possible.
Once you’ve finished rotating the bezel to align with true north, take a reading (in degrees) at the index line on your compass, and write it down. This bearing is the measurement you’ll be following to get to your destination.
Step 4: Align Your Body With Your Bearing

Now that you’ve got your bearing, you can put your map away, and use the compass to guide your steps.
To do this, hold the compass flat out in front of your body, and turn both your body and the compass until the magnetized arrow is inside of the orienting arrow in the needle housing.
Make sure to keep the compass far enough out in front of you to prevent any metal objects on your person from interfering with the direction of the magnetic needle (an object as small as a metal zipper on your clothing can interfere with the accuracy of a compass, so be mindful of this as you set out).
Once the needle is inside of the orienting arrow, you’ll be facing the exact direction of your destination according to your bearing, and you’re ready to start your trek to your destination.
Once you’ve mastered these basic steps, you’ll truly be prepared to find your way out of anywhere.
READ MORE: 8 Best Tips for Wilderness Camping
Pin it for later!